pages

Showing posts with label wooden crafts. Show all posts

Friday, November 23, 2012

BOO! frame

It's always an honor to be featured in Prima's blog, but this month it was something special...it happened twice! Here's another project of mine that was on the blog, the Boo! frame.

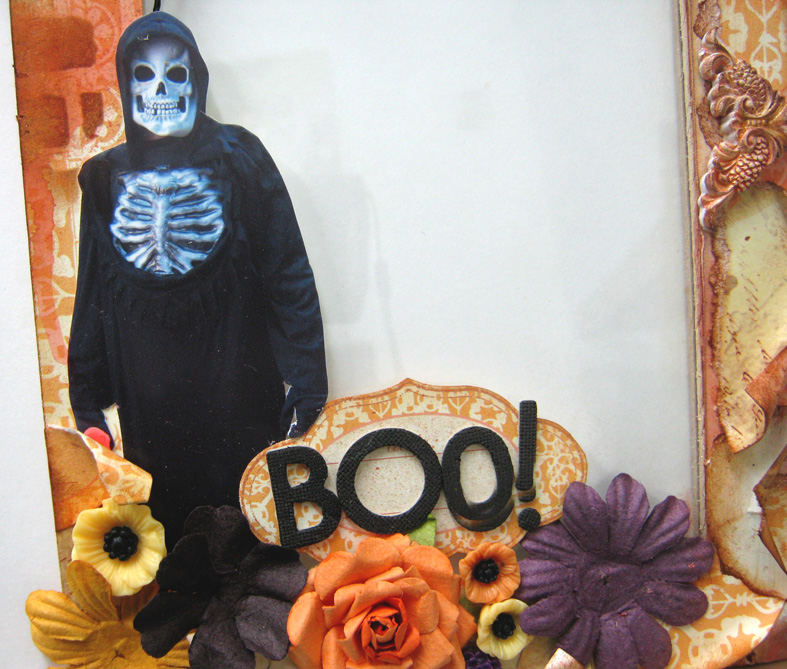
This is a frame I created with a photo of my son's costume which was not only scary and great but was one of my favorite costumes over the years. Had to honor it with a special project...
I started by covering the wooden frame with torn inked paper.I added a little mist and paint to it to enhance the colors and the background. I cut my son's image from the photo and added it to the frame as my focal point.

I created a spider's web from black twine by cutting pieces of twine and adhering them in a web shape. I also added a chandelier and flowers.
 
Now I just need to add the photo to the frame!
 
Have fun creating!
Einat

Friday, March 2, 2012

Technique Corner: Rainbow Baby Frame

A decorated frame is a gift suitable for anyone. A plain wooden frame is like an empty canvas, you can put anything on it. This is a cute frame I created for a little baby boy as a present. The main embellishments I used are different sizes and shapes buttons.

Here are a few tips for making the frame:
·         Paint the frame with white wash.
·         Create a punched frame and adhere.
·         String buttons into a thin metal wire to create a rainbow.
·         Adhere its two ends to animal shaped buttons as if they were holding it.

·         Adhere paper clouds to the top edge of the frame. Adhere the animals on top.
·         Create button flowers on circles of paper and adhere to the frame.

·         Add stars and a title.
·         Add another punched frame to the back of the frame to give it background.

A few challenges:

Cupcake Inspirations: #149 Photo inspiration
365 Cards: New Beginnings
Sketchy Colors: sketch #106
Cupcake Craft Challenge: Boys and their toys
The Pink Elephant: #137 sketch
4 Crafty Chicks: Anything but a card
Moving along with the times: Sketch
My mum's craft shop: #46 shapes
Pixie Dust Dtudio: Buttons
Paper Play challenges: Something old,something new: used an old frame with new buttons.
CES challenges: cream and blue

Have fun creating!

Einat

Wednesday, February 1, 2012

Printer's tray – A moment in time

I have already told you the story about my grandma. Last Saturday we celebrated her and my Grandpa's birthday. It was a great party, special and emotional, a birthday that requires an equally special gift. Here is the gift I made for them: a printer's tray telling the story of their lives and family.

Four of the twelve boxes have photos of our family and the rest of the boxes each tell a little story about a piece of their shared history.

I used different techniques and materials in my creation and a lot of 3D elements. The most visible are the flowers, which some of them were misted and painted. I also included papers, buttons, stickers, stamps, ribbons, lace, embellishments and some less traditional materials like fabric, pearl necklace and a small crochet I did myself.

They were really happy and excited to get this present and it's now hanging on their wall. I'm so happy!

Have fun creating!
Einat

Friday, December 30, 2011

It's a wrap! 2011 Most favorite projects

Wow! I can't believe another year is over. It went by so fast; it seems I didn't get anything done. Seriously, it was a great year, with wonderful achievements and projects and I'm really looking forward to 2012! So…let's say farewell to 2011 with some style and inspiration! Here are my ten favorite projects of 2011:
10. Dear Dad card – I love this card because it's so simple to make, yet so special and sooo my dad! Read more on how to make the card…


9. Digital paper freebie – toward the end of the year I started designing digital stamps, papers and embellishments, and all of them…FREEBIES! My favorite is the Halloween paper. You can still downloadit here…

8. Love Letters mini album – this mini is part of the SINGLE SHEET OF PAPER tutorials. A series of tutorials with ideas, tips and inspiration on how to make great, wonderful projects from only one sheet of paper! Read on to learn how…

7. Journey layout- I love this layout for a few reasons: first, I love the photo of my two boys. Second I love the path that winds towards the horizon. Lastly, I love the tree button! Find out how to create all these great elements…

6. Home is where the heart is frame - I cherish this project because of its message and its photo. I also love all the details: the little chair, the shelf and the flower pots on top. Be inspired with more photos…

5. Treasure box – this project is one of my favorite recycled projects. You can always take something you don't need, like an old tea bag box and turn it into something completely different, like a printer's trey. Read more…

4. Canvas clock – beautiful home décor piece that was selected by you, my readers, as their favorite project! Find out what were the readers' top 10 favorite projects…

Here are my 3 most favorite projects for 2011:

3. Magic of Creation layout-a sentimental layout showing me when I was a child, doing something crafty. If you have creativity in your blood you start early and never stop! Read more…
2. Passover Haggadah – a special Passover present I made for my mother. A family Haggadah that would be passed on from mother to daughter.  Check out all the photos here… and here…

1. Smile layout- my absolute favorite project this year is this layout. Not only because it was chosen to appear on the Prima blog but because it has one of my favorite son's photos. The inside story...

I really enjoyed sharing my work with all of you and I hope I gave you a little inspiration this year. I wish you all a happy, prosperous new year. May you be happy, successful, healthy and loved!

Have fun creating!
Einat


Friday, November 25, 2011

First gift is ready!

Wow! I'm so excited; December is just around the corner! I have planned an amazing, inspiring December Marathon with a great giveaway. Tune in next week to find out all about it!


This Friday marks the beginning of my "start making gifts or you'll miss the holiday" month. Actually it's only 3 weeks and the clock is ticking!! I have to make all my presents and cards and time is short. Here is the first gift I made: an embellished frame that can be hanged on the wall or stand on its own. I plan to make a few more of these and after they are ready to add photos according to the recipient.


This is a wooden frame I covered with patterned paper and sanded the edges a little. Then I added matching festive embellishments.


Have you started working on your gifts/decorations/cards?…so much to do and so little time!

Have fun creating!

Einat

Wednesday, November 16, 2011

Recycled Crafts – FaveCraft Blog Hop

We're hopping again with all of our friends at FaveCraft! This time we're all sharing recycled projects! Great ideas and inspiration on how to create wonderful projects using everyday objects, leftover materials, things you don't need anymore and even things you want to throw away.


My project is a printer's trey. But this is not your ordinary printer's trey, the one you buy at the craft store. My trey is made from an old tea box I didn't need. At first I wanted to throw it away, but then I saw its compartments and I had an idea: why not turn it into a printer's trey?!


I painted it and added photos. To make it interesting I gave each photo a little curve. Then I added a few handmade embellishments. I made it really simple and easy because as it turned out, I ended up teaching it in a few classes for girls and teenagers.

Have fun creating!

Einat

Wednesday, November 9, 2011

Ins(paper)ation: Home is where the heart is 3D frame

“God gave you a gift of 86,400 seconds today. Have you used one to say “thank you?”
William Arthur Ward

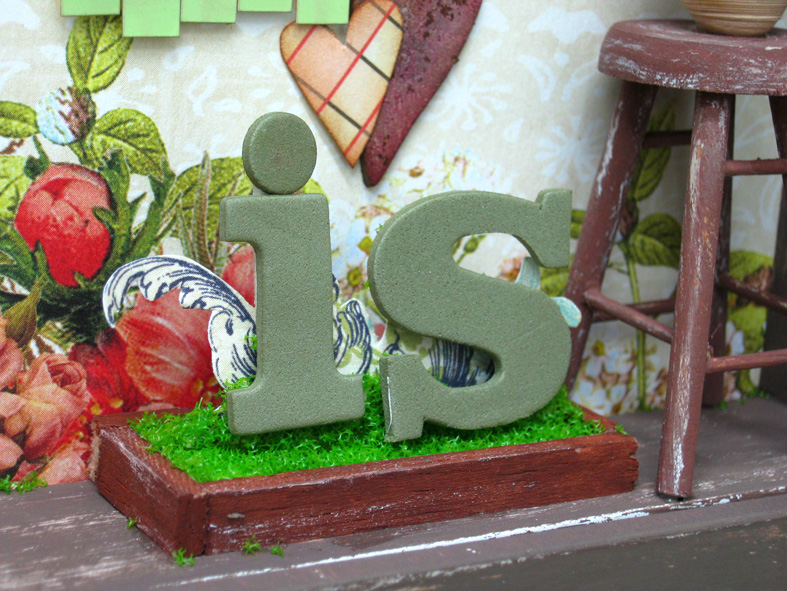
In spite the fact that I don't celebrate Thanksgiving (since I don't live in North America) I think it's a great tradition to appreciate the things you are grateful for. Life has a different meaning if you stop and take stock of all the things you are thankful for. This wonderful tradition has inspired me to create something for and about my family. I created a 3D frame with a family photo, layers, embellishments and one of my favorite quotes: "Home is where the heart is". I first colored the frame with a white acrylic paint. After it was was dry I painted it with brown color. I created the distressed look by sanding the brown layer up to the point where the white color was showing.


I built the book shelf from a few scraps of wood. I painted it with brown acrylic paint and added a distress look with a little bit of white paint. I created the mini books by folding a piece of white paper and wrapping it with a "cover" made from cardstock.


The flower pots and vase including the flowers are created with quilling techniques.


The small grass bed is also built from scraps of wood. It is filled with plain white paper and covered with green flower soft to create the look of grass. The letters are hels by pins stuck to the "grass".


Don't forget to stop for a minute and be thankful for what you have!

Have fun creating!

Einat

Monday, August 1, 2011

Quilling – not just on cards

I have a really good friend who likes crafts and art. We always give each other handmade gifts and it's a big problem for me figuring out what to give her. In the past I have made for her mini albums, frames, a magnet board and other home décor pieces but this time I was stuck. I finally decided to try something new. I love quilling, I like to embellish my cards with it and even my layouts, but I wanted to see if I can embellish a box with it. 


First, I covered a wooden box with two coats of acrylic paint. Then I created my quilling shapes and adhered them to the box. My main problem was how to make sure that the quilling shapes would last. A box is something that is displayed and needs to be cleaned, and quilled shapes are very gentile. My solution was liquid lacquer spray. I sprayed the box with the quilling on it. After it dried, the spray gave the box a beautiful glossy finish and hardened the paper. What a discovery!


By the way, my friend loved it!!


Einat