pages

Showing posts with label interactive designs. Show all posts

Tuesday, August 11, 2015

"I like to move it, move it" - Interactive Mini Albums

If anybody here doesn't like mini albums please raise your hand! I don't think there's anyone...right? Mini albums are so pretty, easy and great they are every body's cup of tea. A while back I shared with you the 10 Reasons to Create a Mini Album and I hope I convinced the few that were still on the fence about mini albums.

Today I want to go a step further and get you all excited about interactive mini albums. Interactive mini album is a mini album that has active mechanisms inside, such as pockets, flaps and tags. The viewer is not just looking at pages and photos but has to be actively participating by opening, pulling, sliding parts on the page. I love interactive mini albums and I want to show you why.


Abundant Space
A mini album has lots of space for photographs in a compact-size album, because all those tags, flaps and pockets allow you to add more photos and journaling in the same size page.

Technique Extravaganza
Interactive mini albums are heaven for all you technique lovers. Creating these moving mechanisms is easy but requires knowledge with the basic paper engineering techniques. Once you master those, and like I said it's really easy, you can go wild with your imagination.


Professional Result
When you create an interactive mini album the result is AMAZING! It looks much more professional and complicated and it makes you look like an accomplished master crafter (which you are!) People will be looking at the mini album over and over again and wondering how you did you create it.


Above & Beyond
If you are a mini album enthusiast interactive design is the next step that will take your mini albums to the next level. It will give you a new versatile set of option to add to your mini albums. 

The Fun Element
Interactive techniques will be a new injection of fun to your craft night with friends, crops or gifts!

Are you convinced yet?
If you are then come on board and join the fun! If you don't know where to begin or you are confused by all the interactive pages and albums online you can join "inter-ACTIVES" - Moving Mini Albums Class and learn everything you need to know about interactive mini albums!

Don't miss out! Keep up with all the crafty goodness by subscribing to the Einat Kessler creative newsletter

Have fun creating!

Tuesday, July 7, 2015

5 Minutes Crafts - Interactive Mini Album

You're probably asking yourselves is it possible to create an interactive mini album in 5 minutes?! Yes it's possible! The secret is in the cutting and folding.


This project is not only easy and fast it also makes a great impression as a complicated project you needed hours to create. It'll be a great brag book or a gift. You can personalize it with a different color scheme or theme!


Here's what you'll need:
One 12x12 double sided cardstock
Trimmer
Bone Folder
Bind - it - All and a wire 

Don't miss out! Keep up with all the crafty goodness by subscribing to the Einat Kessler creative newsletter

Have fun creating!

Tuesday, December 16, 2014

Hanukkah Altered CD Mini Album

Every year I create a Hanukkah mini album for the holiday photos and every year it stays empty. however this year i made a promise to myself to add all the photos!
The mini album is created from CD's in red and yellow colors which are two important elements that need explaining.


Many Jewish holidays revolve around eating specific, traditional foods: matzah for Passover, hamentaschen for Purim and challah bread for Shabbat. On Hanukkah, Jews celebrate the miracle of the oil in the Temple that miraculously lasted eight days when it was only enough for one.
Accordingly, Hanukkah celebrations revolve around the miracle of oil and the menu features fried foods (not very healthy I know). Crispy fried potato pancakes take center stage at the beginning of a Hanukkah dinner, and in Israel and elsewhere, jelly donuts, called sufganiyot, are the most popular Hanukkah food.


Both foods have round shape like a CD which makes it perfect for a Hanukkah mini album!


In regards to the colors...traditionally in the US the colors of the holiday are white and blue, and sometimes silver. The explanation for that are probably the colors of the Israeli flag. However, I think that yellows and reds which are the colors of light and fire are a perfect fit too. After all this is the festival of Lights in which eight candles are lit.


The album design is very basic. All pages are covered with patterned papers. Each page is embellished with candles according to the days of the holiday from one to eight. The candles are created from rolled scraps of paper and a flame I cut from paper and adhered to the rolled paper.
All pages are interactive to allow room for more photos and include decorated tags for journaling.


Follow me on Facebook and YouTube for more crafty treats!
Happy Holidays!

Have fun creating!
Einat

Sunday, December 14, 2014

One Sheet of Paper Interactive Mini Album

I love interactive projects especially mini albums. It's so much fun to go through an album and find surprises in it. Pull a tag, open a door or turn a wheel and find secrets under it. It takes the mini album  to a whole different level. What if I told you you can achieve all that but with only ONE sheet of paper? You can! here's how...


First let me say that I'm so happy I can share a Youtube video tutorial with you because it's really difficult to explain all the steps with actually seeing how they work. Start with a 12x12 cardstock. I used a black one and covered it later but you can use a patterned double sided cardstock and then you can skip the covering part. Score it on the 4" and 8" marks, turn it a quarter of a turn and score again.


Continue according to the items:
First cut along all the lines (that are not dotted) and then fold:
A: fold top center to the right. apply adhesive to top and bottom edges of right square and attach to create a pocket.
B: fold down.
C: fold top left square down. Apply adhesive to right and bottom edges of center left square and attach to create a pocket. fold under center square.
D: fold to the right.
E: fold bottom right square to the left.
F: fold edge of square to the right on 1" mark. apply adhesive to flaps to create two pockets.
G: fold bottom left square to the right.
Fold up to close.


Add tags and inserts to the pockets and embellish. Create strips of paper to hold some of the tags.


The steps are a little confusing to explain in words and it'll be so much easier to watch the video.
I hope you'll join in the fun and try this project. It might look complicated but it's really easy. Just follow all the steps and you're there!

Follow me on Facebook and YouTube for more crafty treats!
Have fun creating!
Einat

Saturday, August 30, 2014

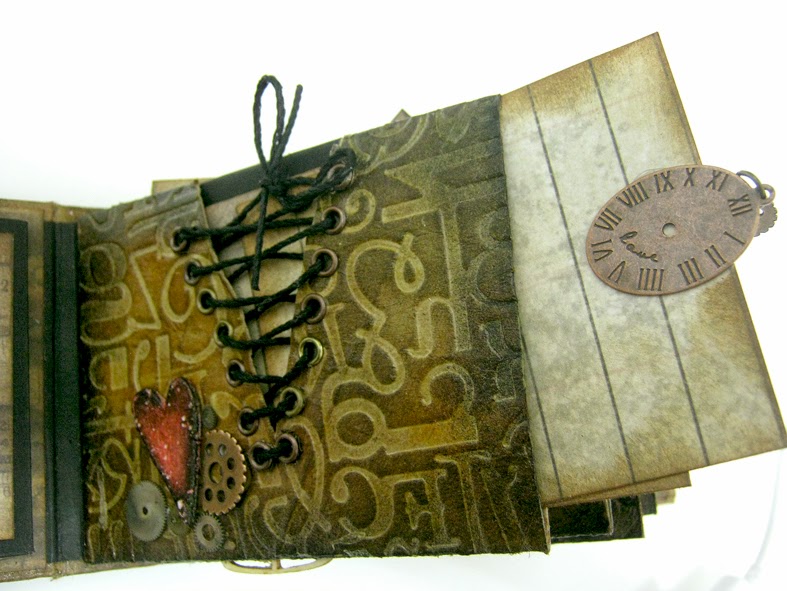
Faux Leather TP mini Album - THE PAGES!

WOW!! I got so many amazing responses. Thank you! I'm so happy you liked this mini album as much as I did. Wasn't it really fun and easy to make? Well...after much anticipation here comes the second part...THE PAGES! We'll venture into these beautiful pages and learn how to create them one by one!

Let's get started!


This album is full of interactive surprises. Pockets, flaps and more... as well as handmade embellishments that will take your breath away. Some of the work is delicate and requires patience but believe me, it's worth it!


Since TP rolls are already pockets, that part is rather easy. All you need for this part is to add tags. I used scraps of paper from Tim Holtz papers to create the tags. To embellish the tags I add a cogwheel or sticker to each one.


The most challenging pages were the corset opening page and the butterfly embellishment page. They took a long time to plan, but you're lucky I've done all that for you already. They do need patience to create but I think you'll agree it's worth the time.


In general the entire mini album took longer to make then I originally thought partly because I tend to try almost every possibility when I design until I'm happy. So I need to work on that... I've managed to edit the video so it will be much shorter but still simple and easy to understand.
Make sure to watch the video tutorial for all those important steps to create all the pages!


I will be happy to see how your mini albums turn out. If you make one please share!

Follow me on Facebook and YouTube for more crafty treats!

Have fun Creating!
Einat

Tuesday, July 8, 2014

Hot Ideas for Capturing Summer memories

Ah, summer, what power you have to make us suffer and like it. ~Russel Baker
It's hot, it's humid, it's sticky and it's here! Summer! We love the long days, the sunshine, going to the beach and not going to school. We go on family vacation, go camping, and generally have loads of FUN! Part of my summer fun is to record these wonderful memories by creating fun layouts and mini albums. it's really great sitting on the carpet on a cold winter's day looking through all those summer layouts and remember the fun we had.
Here are a few hot ideas for creating layouts that will capture all your family summer fun!

Wet Layouts
Who doesn't love going to the beach or the swimming pool to cool off in the inviting blue water?  The water is always a great background for taking beautiful photos with a calm atmosphere or a splatter! There are so many activities to capture: swimming, diving, splattering, collecting sea shells, walking on the beach, learning to swim and so many more. Photograph as many as you can and create wet layouts or a wet mini album.


Going Camping
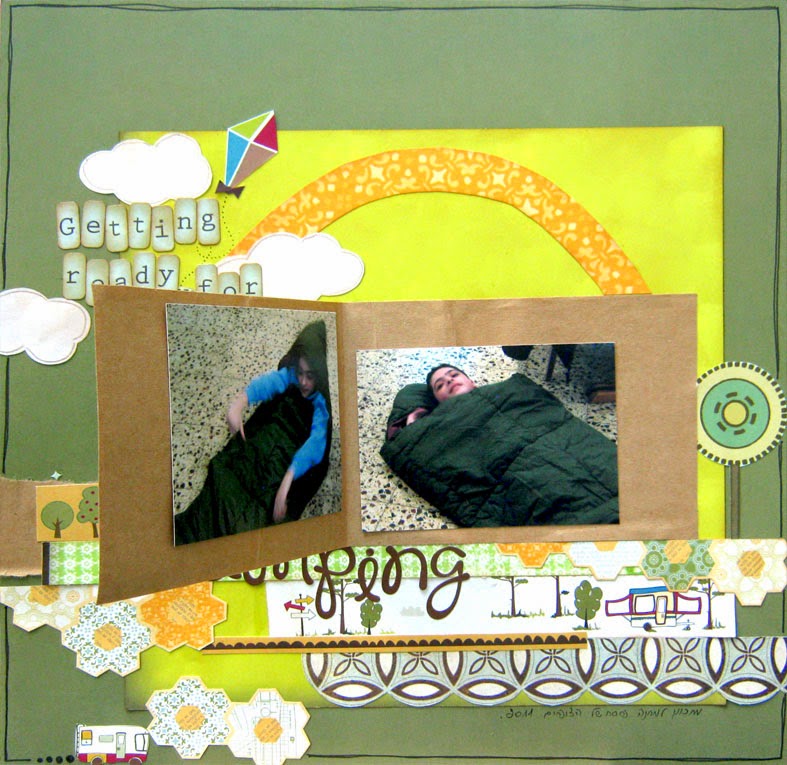
Not only for boys...camping is a family adventure full of photo opportunities. Building a tent in the woods, cooking dinner on a fire or sleeping under the stars, are all part of the camping fun. I even like to take a picture of the preparations, they are not less fun!


Summer Holidays
4th of July is a great photo opp. All the decorations and the fireworks are the perfect backdrop for festive photos and coordinating layouts!


Exploring The Great Outdoors
Hiking, walking, driving are all wonderful ways to spend the day exploring the wonders of nature and being outdoors. Having a picnic or swinging on a hammock are so relaxing and inspiring and can bee a source for funny and goofy photos, especially if the hammock doesn't want to play along...


So many ideas, so little time!
What are your ideas for creating special memories this summer? What ever they may be I hope you will have lots of fun and relaxing time with your family and friends!

Follow me on Facebook and YouTube for more crafty treats!
Have fun creating!
Einat

Saturday, March 8, 2014

Interactive pockets mini album

You all know how much I love creating interactive mini albums, well...this case is no different. This time it's a Basically Bare DT project with the Krafty Keepsakes vintage mini album, which is a really fun envelope mini album that is just waiting to be played with!


First I had to remove the rings binding so it'll be easier to work with the envelopes and later cover them with paper. Then I started to create my pockets. The idea was to add more pockets to the original pocket which is the envelope itself.


I folded each envelope in a different way creating 4 interactive pages full of pockets. Then I started covering them with Bo Bunny The Avenues patterned paper.


Finally I added embellishments from the collection as well as metal clocks, tabs and Prima flowers. I also created tags for journaling to go into the tags.


Make sure to watch the step by step video tutorial to see how I created the different pockets.

Have fun  creating!
Einat