I decided to change my wall art a little, so I created a canvases set. A set is basically one piece of art that spreads on more than one canvas. In my case two 6" X 6" canvases. When you create a set you work on the canvases as if they were one. So the theme, color scheme and embellishments will be the same across the board. The divided yet cohesive look to a canvas set gives it a unique look and draws the eyes to move from one section to the other and by doing so capturing the entire piece.
I started the set with adding modeling paste texture to the background and pieces of tissue paper for layering effect. Then I added distress stains in different colors and blended them together.
My focal point is a leaf ribbon that spreads from top to bottom and is embellished with flowers that were colored with the same distress stains.
I also added a large wood butterfly which was colored with distress stains. I finished the canvas set with Perfect Pearls paint that I created myself by adding a little water. This shiny effect gave the canvases a shimmery finish and definition.
Have you ever tried to create your own canvases set? You can create a row of three or a large square that is made up from four small canvases. Take a look at the video tutorial for more ideas and techniques.
Follow me on Facebook and YouTube for more crafty treats!
Have fun creating!
Einat
Showing posts with label ribbons. Show all posts
Sunday, June 29, 2014
Mixed Media Double Canvas Set
Labels:
canvas,
Mixed media,
ribbons,
Saturday MIXTRAVAGANZA,
Tutorials,
Video tutorial
Friday, May 31, 2013
A long time ago
I recently found some old photos of me as a child and it made me really nostalgic. I decided to create layouts for them and then bind them into an album. This is a layout with a photo of me and my mom when I was tree years old.
I started the layout with a little dripage, stamping and spraying a Prima patterned paper. Then I cut flowers from the One-Up patterned paper from the Doodle Duex collection by Prima which I love and added them to the layout.
I cut the leaf shapes from the same collection's ribbon and also added one large flower. I added the title and the layout was done. Now I have to do the other layouts....
Have fun creating!
Einat
Labels:
craft,
crafts,
layouts,
Mixed media,
paper crafts,
Paper Projects,
Prima,
ribbons,
scrapbook projects,
stamps
Monday, May 27, 2013
Guest Designer - My Stamp Box
I was honored and excited when My Stamp Box asked me to play with their stamps. I got an adorable set of butterflies all arranged in a comfortable plastic box and ready to play with. I created a few projects using these butterflies and had a great time letting them fly...
Have fun creating!
Einat
I started with a layout (obviously) that has all kinds of butterflies on it. I stamped the background patterned paper with watermark and distress ink so I got two shades of images. Then I stamped some more images on cardstock, cut them and added them to the layout with 3D tape to give them dimension.
My next project was a tag with some cool stamping techniques. I inked the tag with several colors of distress ink and then stamped the butterflies. Then I stamped two images with distress ink and put some perfect pearls on it. I hit set it to get a sparkly shiny look. I also added cut out butterflies, ribbons and a sentiment.
Thank you My Stamp Box..it was a blast!Have fun creating!
Einat
Labels:
craft,
crafts,
Guest Designer,
layouts,
Mixed media,
paper crafts,
Paper Projects,
ribbons,
scrapbook projects,
stamps
Tuesday, January 1, 2013
Telephone Scraplift Fun!!
To celebrate the new year a few friends and I decided to have fun with a telephone scraplift game! It's always interesting to see the initial sketch compared with the final layout and the journey in between.
Here's the layout I got from libeeti.
* Three round embellishments: in libeeti's layout there are two doilies and a big paper flower, I used patterned paper circles.
* For embellishments I added hexagons and cork letters.
Keep hopping and check out the next blog for an inspiring interpretation! (click on this sentence)
Tanya - http://tany-sol.blogspot.co. il/
Have fun creating
Einat
Here's the layout I got from libeeti.
לכבוד השנה החדשה החלטנו לשחק במשחק טלפון שבור כייפי. הנה הדף שקיבלתי מליביטי
Here's my interpretation....
הנה הפרשנות שלי
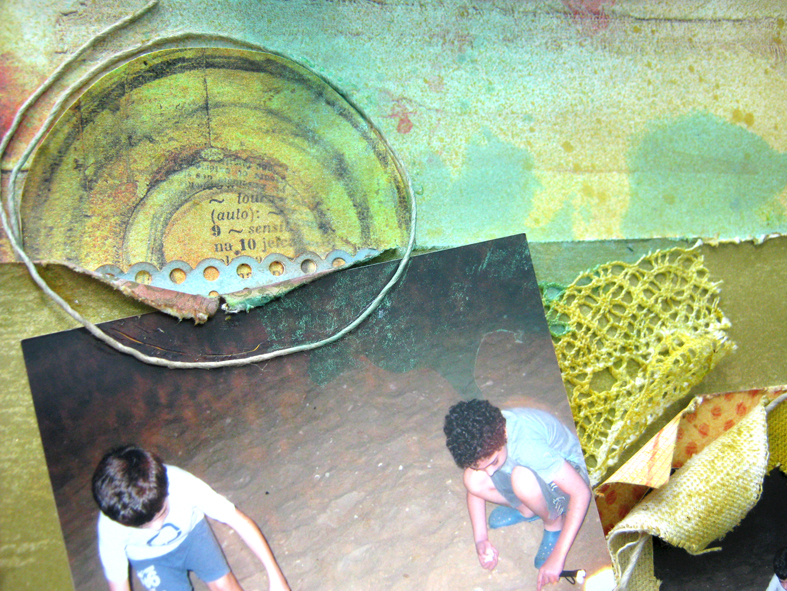
Two major things happened in my layout. The first is the style, I completely changed the style and the mood of the layout, by taking it to a more mixed media look. The second is the interpretation of the sketch, I used the main motifs from libeeti's layout and made a different interpretation.
* Two photos,the right one with a frame: libeeti used a paper frame, I used a canvas framed that I misted.* Three round embellishments: in libeeti's layout there are two doilies and a big paper flower, I used patterned paper circles.
לקחתי מוטיבים מרכזיים מהדף של ליביטי ולקחתי אותם לכיוון של מיקס מדיה: שתי תמונות כשהימנית ממוסגרת, שלושה קישוטים עגולים
* Horizontal borders and strips: I used a few materials for the borders such as paper, lace and bandage.
פסים אופקיים לרוחב הדף ובורדרים
* The W flags shapes: I used the W shape and created little W tip flags.
צורת וי בקצה הבורדרים של ליביטי הפכה אצלי לגידלונים
* For embellishments I added hexagons and cork letters.
Keep hopping and check out the next blog for an inspiring interpretation! (click on this sentence)
Tanya - http://tany-sol.blogspot.co.
Einat Kessler - http://scrapinit.blogspot. co.il/ - you are here!
Ruthy - http://rtdesings.blogspot. co.il/
Have fun creating
Einat
Labels:
Blog Hop,
craft,
crafts,
Fabric,
layouts,
Mixed media,
paper crafts,
Paper Projects,
ribbons,
scrapbook projects
Wednesday, October 3, 2012
Technique Corner - Texture
Texture is a great way to create interest in a layout. It can emphasize a material or an area in the layout. It also gives the eye something new and different to look at and your fingers something exciting to feel. There are many ways to add texture to a layout and we will learn them one by one.
Have fun creating!
Einat
The first way of adding texture is fabric: it has a unique look and feel to it, it's flexible and easy to work with. One of the ways to add fabric is to use ribbons. In this layout I've used ribbon in two ways:
1. cover chipboard shapes with colorful ribbon. After adhering the ribbon to the chipboard cut around the shape with scissors.
2. Create curls to mimic vines or barnches. I've added curled ribbon strips near the flowers for extra dimension. Simply adhere one end of the strip to the paper and curl it. Adhere the curled ribbon in several points to keep the ribbon curled.
Make sure to follow the blog for the next Technique Corner!
Einat
Labels:
craft,
crafts,
DT My Punch,
kit of the month club,
layouts,
paper crafts,
Paper Projects,
ribbons,
scrapbook projects,
Technique,
Technique Corner
Wednesday, September 14, 2011
101 Flowers Tutorial #7: ribbon flower
I love ribbons, you love ribbons, everybody loves ribbons! Why? Because they are so versatile, pretty and fun. One of my favorite things to create from ribbon is flowers.
From each ribbon you can create two sizes of flowers: big and small, all you need is a needle and thread:
1. Thread the ribbon on the bottom.
2. Pull the thread to crease the ribbon.
3. Join the two edges with the thread.
4. To create a smaller flower fold the ribbon in half length wise and repeat the first stages.
5. To finish your flowers add a brad or a button in the center.
6. You can create layered ribbon flowers too!
Have fun creating flowers for your projects!
Einat
From each ribbon you can create two sizes of flowers: big and small, all you need is a needle and thread:
1. Thread the ribbon on the bottom.
2. Pull the thread to crease the ribbon.
3. Join the two edges with the thread.
4. To create a smaller flower fold the ribbon in half length wise and repeat the first stages.
5. To finish your flowers add a brad or a button in the center.
6. You can create layered ribbon flowers too!
Have fun creating flowers for your projects!
Einat
Monday, January 31, 2011
CHA – Day 3
There are so many new and beautiful paper lines and products but you can see all of them on the companies' websites. What I wanted to share with you are the originality and the imagination of the displays. Some of the companies really took it to the next level and created some amazing displays. One of my favorites was the DCWV display. Their designed a paper fashion line, a set of beautiful dresses all made from paper!!! It looks like fabric, but trust me…it's all paper!


SEI took their new lines and created cute, cheerful and fun mobile. So simple and so beautiful.
The people from The Ribbon Company were probably very hungry when they designed their display. Look at all the yummy cupcakes and cakes…they are all made from ribbons!!!
I also liked the GCD bycicle!
CELEBRITY WATCH!
I had a lot of fun today meeting some of my old friends around the show floor. Donna Downey was in a hurry, as usual, to get to her demonstration.
Natalie Kalbach, a Tattered Angles DT member from Germany was busy with her demo.
Birgit Koopsen from the Netherlands was checking out some new products for her workshops.
And Natasja Verbeek a Cosmo Cricket DT member was teaching her "Make & Take"
I'm off to start day!
Einat


SEI took their new lines and created cute, cheerful and fun mobile. So simple and so beautiful.
The people from The Ribbon Company were probably very hungry when they designed their display. Look at all the yummy cupcakes and cakes…they are all made from ribbons!!!
I also liked the GCD bycicle!
CELEBRITY WATCH!
I had a lot of fun today meeting some of my old friends around the show floor. Donna Downey was in a hurry, as usual, to get to her demonstration.
Natalie Kalbach, a Tattered Angles DT member from Germany was busy with her demo.
Birgit Koopsen from the Netherlands was checking out some new products for her workshops.
And Natasja Verbeek a Cosmo Cricket DT member was teaching her "Make & Take"
I'm off to start day!
Einat
Labels:
CHA 2011,
paper crafts,
Paper Projects,
ribbons
Subscribe to:
Posts (Atom)


