pages

Showing posts with label Prima. Show all posts

Saturday, November 23, 2013

8 Dayz of Light

We'll be celebrating Hanukkah in just a few days so I thought I would share with you a mixed media layout you can create with your holiday photos.


In this layout I used a few easy but really cool techniques to create the festive light effect I wanted. I started with creating a corrugated paper. I had a piece od corrugated paper I got from IKEA but it was covered only on one side. So I covered it with a 12X12 patterned paper to create the cover. Then I tore it to create a layered effect.


I created dripage with acrylic paint to mimic the melting wax of the candles.
I added more layers of paper all in orange and yellow colors like the colors of a candle's flame. I also embossed some of the papers with a Spellbinders embossing folder.
I finished my page with hand made candles I created from rolled pieces of paper and layers of flowers in matching colors.


If you were looking at this page and asking yourself "what exactly is Hanukkah anyway, why 8 candles?" Here's the Hanukkah story in a nut shell...
* In 175 BCE, Antiochus Epiphanes, invaded Judea (ancient Israel).
* The Temple in Jerusalem was looted and services stopped, Judaism was outlawed. 
* Antiochus ordered an altar to Zeus erected in the Temple. He banned circumcision and ordered pigs to be sacrificed at the altar of the temple.
* Antiochus's actions provoked a large-scale revolt. By 165 BCE the Jewish revolt was successful.
* The Temple was liberated and rededicated, it was cleansed, a new altar was built in place of the polluted one and new holy vessels were made. 
* Olive oil was needed for the menorah in the Temple, which was required to burn throughout the night every night.
* The story goes that there was only enough oil to burn for one day, yet it burned for eight days, the time needed to prepare a fresh supply of oil for the menorah. An eight-day festival was declared to commemorate this miracle - Hanukkah!

You can easily create the same layout for Christmas simply by changing the color scheme and using green, gold and red.

Have fun creating!
Einat

Thursday, November 14, 2013

Happy Hannukah card with Spellbinders

Hanukkah is just around the corner! In two weeks we'll light the first candle and start the eight days holiday which is one of my favorite holidays.

Here's the first card I created for the holiday, first of many I still need to do...


This card tells the story of Hanukkah through it's bright yellow and red colors which mimic the colors of the candle's fire. It will also look great next to the Menorah because it can stand on its own.


For this card I used papers from the amazing Sunset collection by Prima. I created the front of the card with one of my Spellbinders embossing folder Numbers and letters. This embossing folder I so easy to use and has such an amazing effect! I cut strips of paper to create the candles and added flames I cut from the same paper. To finish the card I added a big 8 and a title.

Don't wait until the last minute to make your holiday cards like me...

Have fun creating!
Einat

Saturday, November 2, 2013

Conversation - mixed media layout

A while ago I caught my grandfather and son on camera while they were completely immersed in a live conversation.  These two can talk for hours about science, machines and philosophy. There is something magical going on between this 90 year old man and his 11 year old great grandson that I wanted to capture on a layout.


In order to create a conversation theme I wanted to use letters and text. I started by layering three patterned papers with text pattern on them after tearing them into the desired shape. Then I added letter stickers and a lot of them. I wanted to created a waterfall of letters symbolizing a flowing conversation.
 

I added a little mixed media magic with glimmer mist spraying and stenciling with gesso and distress ink. I finished the page with flowers and chipboard embellishments. You can watch the video for a step by step tutorial on how I created this page.


This was such a special layout to create and it's going to be a wonderful souvenir for both of them.

Have fun creating!
Einat

Saturday, September 21, 2013

Round Chest Drawer

Hello crafty friends!
It's time for another Saturday MIXTRAVAGANZA video tutorial!
Today I'm so excited to share with you one of my greatest passion in crafting...paper engineering. This is a field where you design patterns and build things from scratch.


Today's project is beautiful and useful. We will be building a round chest drawer that can store your buttons, beads and embellishments.

If you would like to have the pattern on the video contact me and I'll send you a PDF file.
This chest drawer is versatile and can be built in levels to have more storage.


All you need is 2 disks, patterned paper and a piece of chipboard. Join me in this fun project!

have fun creating!
Einat

Tuesday, August 27, 2013

Our Wonderland

A new layout I designed for Prima August BAP. The sketch had two distinct areas divided by a border. So I decided to create a layout that tells a two part story. The left side is the name of the story, the cover of the book if you will. The right side of the page is the story itself, a story about a land of wonders. The story is "poring" out of the torn layered papers border that resemble old book pages.

To create this layout I started by taring my base paper and then I added layers of patterned paper and rolled them out with my fingers.
 
I added the images to the layout and started building the wonderland around them using flowers and embellishments. I created the flow of the layout by arranging the embellishments from the border and to the right so it will look like they're coming out of the layered papers.
 
To finish the layout I added stars with acrylic white paint and a stencil as well as dabbing a sponge with the same paint all over the paper.
 
Prima products used:

Nature Garden #950057
Pixie Glen #843182, #843175, #843229
Divine #950453
Romantique #843458
Millicent Meadow Lark #556174
Gillian Lemon #552992
Sugar Plum Roses Carribean #543686
Pearls Tea Thyme #562533
Mini Rose Sanded #535490
Say it in Crystals #544744, 551384
Chipboard Stickers #551247, #555283, #551490
Resin Fairies #891503
Flutter Vines Cerlse #533724

Have fun creating!
Einat

Saturday, June 29, 2013

Saturday MIXTRAVAGANZA - Mixed Media Bulletin Board - Video Tutorial

We are all so busy in our daily lives. No wonder we forget the little things we need to do. I have found a great solution...create a bulletin board to hang our notes so we won't forget!


I'm so happy and excited to share the second project in the Saturday MIXTRAVAGANZA series. This bulletin board is made from canvas and embellished with cute birds sitting on a wire and in the tree. On the wire I've added small clothes pins to hang my notes and reminders.
For full instructions on how to make the bulletin board watch the video.


Materials list:
8X8 canvas
Spellbinders Media Mixage Ephemera papers
Spellbinders Media Mixage Birds One Dies
Lindy's Stamp Gang Starburst - Sea Mint Green
Lindy's Stamp Gang Moon Shadow Mist - Treasure Island Turquoise
Tattered Angels Glimmer mist - Blarney, Golden Terracotta, Apple
Prima Essentials Floral Embellishments No. 10
Prima Felt Stems
Prima Shabby Chic Treasures - Resin #890834
Small wooden clothes pins
White string
Ranger Distress ink - Photo Vintage
Ranger Multi Medium - Matte


Have fun creating!
Einat

Friday, May 31, 2013

A long time ago

I recently found some old photos of me as a child and it made me really nostalgic. I decided to create layouts for them and then bind them into an album. This is a layout with a photo of me and my mom when I was tree years old.

I started the layout with a little dripage, stamping and spraying a Prima patterned paper. Then I cut flowers from the One-Up patterned paper from the Doodle Duex collection by Prima which I love and added them to the layout.
 
I cut the leaf shapes from the same collection's ribbon and also added one large flower. I added the title and the layout was done. Now I have to do the other layouts....
 
Have fun creating!
Einat

Friday, May 24, 2013

This shoe is made for walking....

Well...maybe not exactly for walking but definitely for altering! I got this cute turquoise shoe adhesive dispenser at the Scotch booth at the winter CHA and I knew immediately I'm going to alter it! It took awhile but I finally did it!

I first covered the shoe with a transparent tape to give the shoe a little pattern and then I added all kinds of Prima embellishments such as flowers and resin window.
 
I also added the word SHOES on a tag I've attached to the shoe and completed the title on a strip of paper on the bottom of the shoe.
 
It was such a fun crazy project to do...you should try it!
 
Have fun creating!
Einat

Monday, May 6, 2013

Key to my heart

I had the pleasure of meeting the fabulous Limor Webber and see her in action! As a designer and teacher my self I always enjoy and appreciate being inspired by a fellow scrapper. Here's my interpratation to a layout created by Limor.

 I used Prima's beautiful papers, metal embellishments, flowers and little trinkets from my treasure box. I especially love the metal keys I added (thanks dear Ola) to compliment the layout's title.
 
This layout has it all...a lot of layers, hidden surprises and many techniques: distressing, inking, fine cutting, stamping and taring. I also used techniques such as adding gesso accents and embossing the metal with the great Lindy's Stamp Gang two tone embossing powder.
 
Have fun creating!
Einat

Monday, April 29, 2013

You and Me

Taking part in Prima's BAP is always fun and it's even better when my layout is featured in their blog!

In this layout I used a few mix media techniques that gave it more dimension and texture. I used  two kinds of circles masks. I started with molding paste to create white raised dots on the background. Then I added more dots using two colors of distress ink and a mask. I sprayed the layout with glimmer mists to add a little more color. I also stamped the backgorund with brown distress ink to add even more depth to the layout.

I used two copies of the same photo, onein color and the other in blck and white and then I added embellishments like ribbons and flowers. Finally I added a title and inked the edges of the layout.

Have fun creating!
Einat

Friday, November 23, 2012

BOO! frame

It's always an honor to be featured in Prima's blog, but this month it was something special...it happened twice! Here's another project of mine that was on the blog, the Boo! frame.
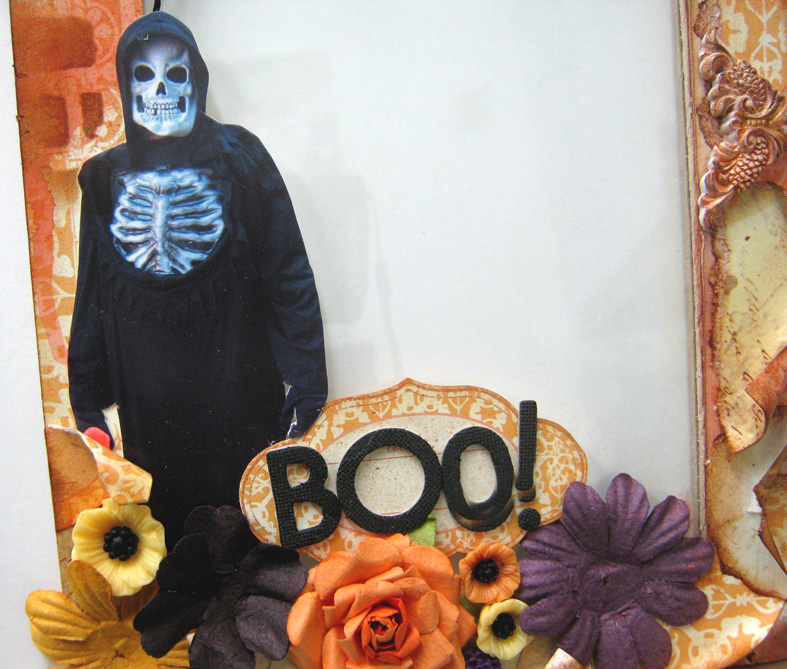
This is a frame I created with a photo of my son's costume which was not only scary and great but was one of my favorite costumes over the years. Had to honor it with a special project...
I started by covering the wooden frame with torn inked paper.I added a little mist and paint to it to enhance the colors and the background. I cut my son's image from the photo and added it to the frame as my focal point.

I created a spider's web from black twine by cutting pieces of twine and adhering them in a web shape. I also added a chandelier and flowers.
 
Now I just need to add the photo to the frame!
 
Have fun creating!
Einat