pages

Showing posts with label Scrap Jewelry. Show all posts

Saturday, June 14, 2014

Ice Resin Pendants

I'm not a jewelry maker but every now and then I like to play with a little bit of jewelry making. It's actually kind of easy if you try it. My favorite material to play with is Ice Resin, which is  a 2-part epoxy resin. Part A is the Resin. It has a slightly blue tint and Part B is the hardener. It has a very slight yellow tint. It comes in a plunger that dispenses equal parts of both parts and is really to use.


It's really fun to play with and the only problem, at least for someone like me who likes immediate satisfaction, is that you have to wait a few hours before it's dry. I made three pendants and tried a few things and techniques.


First I tried different mediums to color the resin. Both Perfect Pearls powder and acrylic paint worked very well and blended completely with the resin. You can create different degrees of transparency depending on how much paint or powder you mix.


Then I had lots of fun working with Ice Enamels which is sort of an embossing powder that works great with the resin. The great thing was to create layers with  the enamel and adding embellishments.
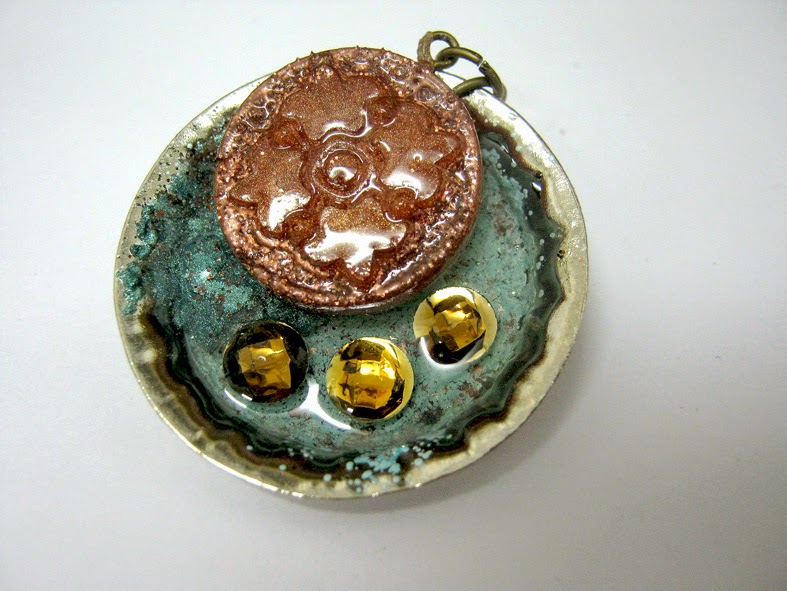


Finally I did some Ice Resin Molding. I used Martha Stewart and Mod Podge acrylic molds and also came up with a great idea of how to turn the molds into beads or pendants. When the resin is cured it slides out of the mold and it's ready for use.

I assembled all the parts to beautiful shiny pendants and I'm really happy with how they turned out. Check out the video for all the details.
Do you create any jewelry? If not this was a fun way of starting!

You can also  Follow me on Facebook and YouTube for more crafty treats!

Have fun creating!
Einat

Saturday, January 11, 2014

Window Triple Frame

Hi friends! Sometimes you see a product and it takes you to unexpected places! This is what happened to me when I saw the new window pane by Basically Bare. I came up with a mixed media window frame that was so much fun creating.
I created two frames with chipboard strips measuring: 1 1/2″ X 9 5/16″  (inner frame) and 1 1/2″ X 11 5/16″ (outer frame). Each strip is cut at a 45 degrees angle at both ends, which will insure a professional looking frame. Build each frame and secure it on the back with adhesive tape.
 

Embellish the frame and window with different metal embellishments, flowers, jewelry etc. I have a box full of trinkets and findings that I get from flea markets, garages, scrap yards and hardware stores. After the frames and window are embellished cover everything with a gesso. You will need a bit of patience to cover everything but it’s worth it! Make sure you get into all the nooks and crannies and when you are done dry it well with a heat tool.


Adhere the window to the frame and spray everything with color sprays. At this stage it’s important to dry your project between sprays otherwise they will all mix.
Instead of embellishing the windows you can add photos or create a combination of the two.
Now you have a beautiful home décor piece to hang on your wall with your personal touch and photos.

Watch the video tutorial for a step by step instructions.

Have fun creating!

Einat

Monday, May 13, 2013

Scrap your jewelry

DT project {Spellbinders International Blog Ambassadors}
I'm usually not a jewelry person. I love all things paper and I always thought jewelry was not my thing. I thought so...but I guess I was wrong, because when I saw these beautiful Spellbinders bezels I just couldn't resist. I created a three part pendant filled with vintage treasures.

I started with spreading a little glitter inside the bottom triangle and then attached a piece of an old vintage jewelry on top of it.
 
In the middle part I put a metal flower and embellished it with pearls.
The upper small circle was filled with small metal beads and adhered on a large metal flower.

All the bezels were filled with ice resin I also embellished the necklace itself with a few beads and buttons.
 
Have fun creating!
Einat

Friday, October 28, 2011

Personal scrap jewelry

How many times did you look for just the right piece of jewelry and couldn't find it? It happened to me so many times, the color is wrong, the shape is too big, the mood is completely off and you left with the what you have worn so many times before.


Well..I think I found a solution, Make your own! I know I'm not inventing the wheel and that people have been making their own jewelry for a long time. However I want to share with you my way of doing it and combining my love for paper and scraps.

You can take a piece of acrylic block and turning it into a pendant by adhering a pretty pattern paper on the back and attaching a small metal ring for the necklace. Another way is to take a small metal frame and insert a square of paper in it. You can stamp the paper, distress it or paint on it. On top of the plastic add a little bling and you're set to go.


Or you can take a bottle cap and create a more 3D pendant. Punch a circle from pattern paper and adhere to the inside of the cap. Add handmade flowers, rhinestones and some metal embellishments.


Have fun creating!

Einat