pages

Showing posts with label Blue Fern Studios Video Educator. Show all posts

Tuesday, March 24, 2015

How to use unsuccessful photos on a layout

In the digital age we're not afraid to take pictures and photograph things because we can always delete it! But I still have old photos which are not so successful to say the least and it really bother me that I can't do anything with them. When I say unsuccessful I also mean blurry photos but mostly un scrapable photos. Those photos which don't tell any story, which have unwanted people in the background or not so nice facial expressions. The photos where somebody else took for me and I wish I didn't ask because they are too close or too far or not what I wanted...you get the picture.

I challenged myself to use them and come up with a way to create layouts with them. Here is what I came up with...


The first layout is a collage. Many small photos I cut from the original photo. I cut the faces that were lost in the noisy background or were too far to see. I used Blue Fern Studios' Marrakech Panel to create a grid to house the small photos. I sprayed the chipboard with several colors and added a little white gesso and then separated the inner pieces. I arranged the grid, the inner pieces and the pre cut photos on the page and just added a few cut pieces from patterned paper.


You can watch a step by step video tutorial that I created for Blue Fern Studios to check out how I created this layout. Just click here.

For the second layout I used a cut image of my son which I cut out of the photo. I always wanted to use this photo but he always seemed to angry in the photo and I didn't know how to work with that. The idea I had was to use "This is my Life" chipboard by BFS and add something to it. So the title became: "Mom...this is my life!" which fits that angry face.


For the flower garden I used flower chipboards by BFS and colored them with Aquarelle pencils and a water brush. Then I "planted" them in the sprayed cheesecloth I used as grass/flower bed. I also added some paper flowers to have a rich garden fit for spring.

I hope this has inspired you to challenge yourself to use your not so successful photos. Which ones would you use first?

Follow me on Facebook and YouTube for more crafty treats!Have Fun Creating!
Einat

Sunday, February 22, 2015

Masculine layouts: Blue Fern Studios

I'm a big fan of masculine layouts and I have to be because I have two teenage boys who like to look at all the layouts I create with their photos and comment about them. So I always have to balance between design and embellishments, make it interesting but not too feminine.


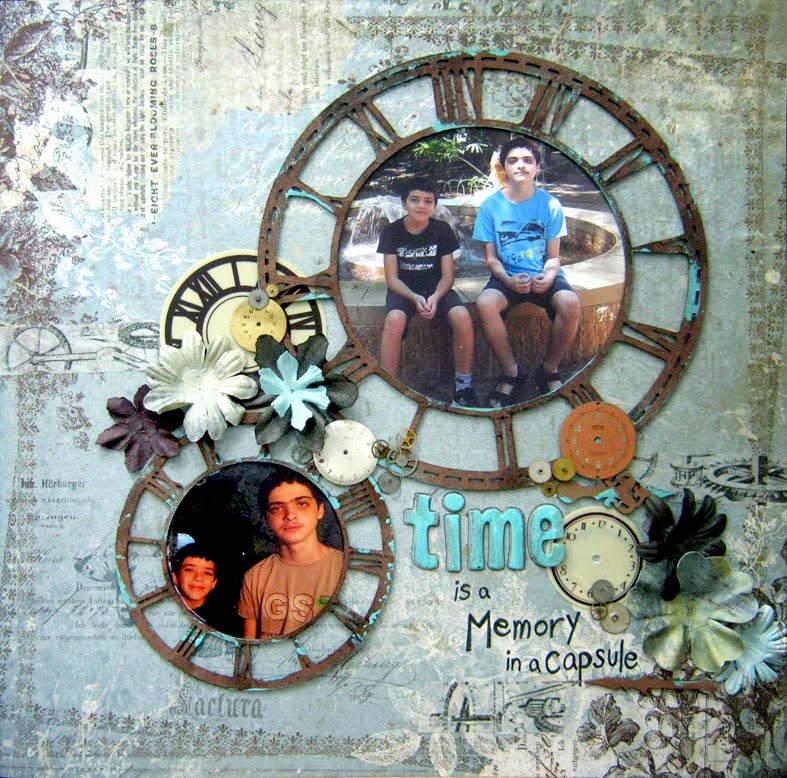
In these two layouts I did just that. The first layout is pure masculine, not a flower in sight...only gears and cogwheels with masculine colors. All the chipboards were colored and embossed in several layers using different embossing powders. I cut the photos into circles in matching sizes to the chipboard. After adding them to the layout I add some doodling with a white gel pen as well as a title.
Check out the video tutorial on the Blue Fern Studios channel.


The second layout has flowers on it. I like adding flowers to boys' layouts as long as I keep the balance and not add too many. I also try to limit myself to a masculine color scheme and avoid colors like pink.


Do you create masculine layouts?

Have fun creating!
Einat

Tuesday, February 3, 2015

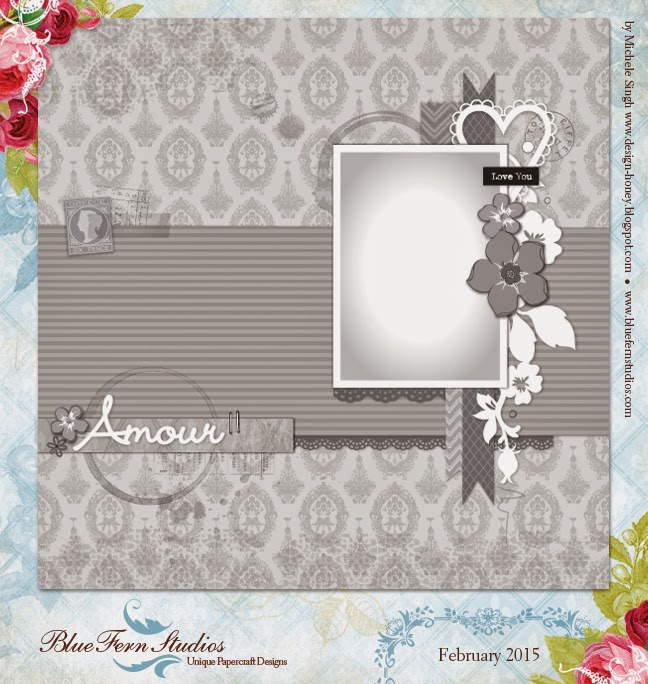
Blue Fern Studios February Sketch

Welcome to February and a brand new sketch! Since this is known as the month of LOVE, this is a romantic sketch for you to work with, complete with a heart. Of course your project doesn't need to be love-themed you can interpret the sketch any way you'd like.


One lucky winner, selected by a random draw, will receive a prize package of Blue Fern Studios chipboard! Go over to the Blue Fern blog and check out all the great layouts created by the DT and submit your layouts.

Have fun creating!
Einat

Thursday, January 22, 2015

One of a Kind Layout with Blue Fern Studios

So excited to share my first project with Blue Fern Studios! When I was asked to join their video education team I was so happy and honored that I could inspire so many of you with new video tutorials!


So my first project is a boy's layout (what else?) with papers from the Sanctuary line and cool chipboards. In my videos I'll focus on different techniques to alter and cover the chipboards as well as tips and tricks on more fun ways to use them.


In this layout I used the Printer's Bits chipboards both as embellishments and as stencils. It's an easy techniques that creates an amazing pattern on the paper while covering the chipboard at the same time!!


I also added flowers with matching colors and the title. The original title was "One of a Kind" but since my three guys are on the photos I altered the title to "One 2 3 of a Kind" by adding the numbers!

My second project is a small 4X4 canvas. I'm going to create a canvas wall in my studio that will be filled with 4X4 canvases all with empowering, encouraging and positive statements! So here's the first one.


It's basically chipboards on canvas. I used the Directions chipboards to create texture by blending them into the background with gesso and then sprayed everything. Then I wrote the sentence with a pen nib and black ink on top of the texture wrapping the texture around the letters.

Do you use chipboards in your projects?

Have fun creating!
Einat

Sunday, January 11, 2015

Mixed Media Perpetual Calendar with Blue Fern Studios

Before the age of smart phones and computers remembering important dates was difficult, at least for me. In those days I used to create a perpetual calendar that had the months only and I wrote all the birthdays and anniversaries dates so I won't forget. I decided to create another calendar even though I have all the dates on my phone...


This calendar doesn't end when the year ends. Because it has only months it is perpetual and good for every year. On the front of each page there is the number of the month and on the back there is a place to write all the important events of the month.


I created this calendar with the new Blue Fern Studios paper collection Sanctuary and embellished it with different Blue Fern Studios chipboard. Since the chipboard have very intricate designs I didn't cover them with papers. I used water color pencils and perfect pearls in different techniques.


I also used the pattern paper to cover the Ikea picture frame, I turned the double sided thick cardstock to tissue paper with water! An easy fun technique that you can try.

Follow me on Facebook and YouTube for more crafty treats!

Have fun creating!
Einat

Wednesday, January 7, 2015

Blue fern Studios January Sketch

I was asked to join the Blue Fern Studios video education team this year. I'm so happy because I get to play with their amazing chipboard and papers. My first video tutorial will be on the air next week! 

But wait...you can do that too!! Follow this sketch and create a layout with at least one piece of Blue Fern Studios chipboard or Blue Fern Studios paper. Please note that you do not need to use the pieces featured in the sketchYou can find the store nearest you HERE.


One lucky winner, selected by a random draw, will receive a prize package of Blue Fern Studios chipboard! Go over to the Blue Fern blog and check out all the great layout created by the DT.

Another news from Blue fern Studios is the new paper line called Love Story. Check it out...


Have fun creating!
Einat