pages

Thursday, May 31, 2012

SEM Blog Hop


Welcome to Scrapping Everyday Miracles birthday celebration! This exciting hop planned for you this weekend is not all, there will be a tutorial and techniques from past designers and 5 fun and easy challenges that you can enter to win some amazing prizes throughout the weekend. The celebration doesn't stop with the blog... There will be games each day of the event that will have some fabulous prizes on our facebook group.

Each of the Design Team members and the Guest Design Team members created a project with the theme of celebration to show you on their blogs and they will be showing you their favorite project that they created over the past year at Scrapping Everyday Miracles.
So are you all ready?
 It is time for some hopping!  The hop will remain open until Sunday night, June 3rd at midnight PST.
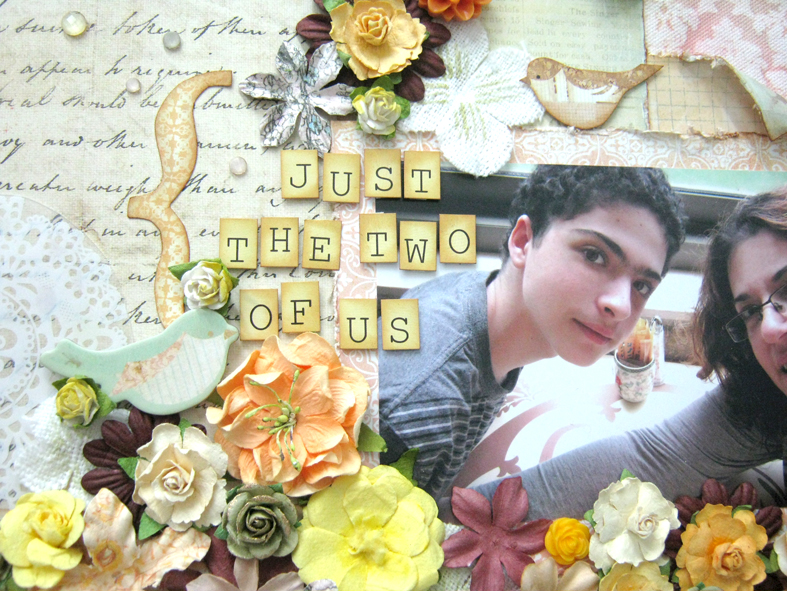
My celebration themed project is a birthday card that turns and reveals a surprise.
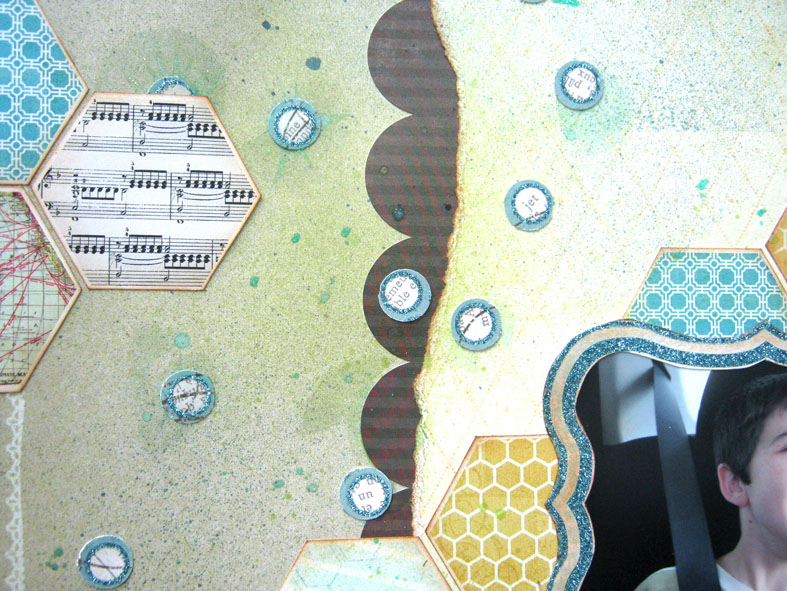


Here is my favorite SEM project. I've only been with the DT for two months so it's a new layout and you probably saw it recently on the SEM blog. I love this lo because I had so much fun creating this room with my son, who was so happy to have his astronomy room!


Here is the hopping list, make sure that you hop along to each blog because you never know where there might be more prizes hiding along the way!
Einat's blog <<<< you are here
Happy Hopping!
Have fun creating!
Einat

Wednesday, May 30, 2012

Interactive flap Tutorial

Today I'm sharing a fun easy tutorial on how to add interest, surprise and a lot of fun to your layouts on Scrapping Everyday Miracles. Interactive design in scrapbooking is when you add something that moves to your layout. If it has to be opened, pulled, turned or pushed, it's interactive! Today I'll show you how to add a flap to your layout.


1. To create the flap you'll need one 4" by 6" photo and two smaller photos. The flap is great for creating more space on your layout there by enabling you to add more photos as well as hiding photos which are not so perfect but you still want to use.

2. Take a 4" by 12" piece of double sided cardstock and fold in half.

3. Adhere the flap to your layout by putting glue only on the bottom part of the flap.

4. Adhere the large photo on the outside flap.

5. Adhere the two smaller photos to the inside of the flap.

6. Add embellishments, title and your interactive layout is ready!

Have fun creating!

Einat


Tuesday, May 29, 2012

What I like about you

Sometimes it's so much fun just to have fun! this layout is exactly that...fun. I wanted to give it the same feeling I have when I imagine my youngest son. He's funny, smart, likes to have fun, run around, play, get dirty and being a boy!

This layout has got all that. Whimsy background, that I misted with glimmer mist and then added shiny punched dots. A funny photo and a great title and sentiment. The layout has a lot of different shapes on it and that gives it flow and interest, everywhere you look you see something else.

Created for:

Smile for Bird is the word
Misting for Scrap Fit
Dig out the old for Top tip Tuesday: old background paper and frame.
Punching for Southern Girls
Hexagons for Crafts 4 Eternity

Have fun creating!

Einat


Monday, May 28, 2012

Maximize your supplies – leftovers card


Cards a great way to use your stash of leftovers! I don't know about you but I have a drawer full of paper leftovers and for some strange reason it keeps on growing no matter how much I use its content. So every now and then I create a few cards from different kinds of papers.
This is a fun and easy card that is made from scraps of 7 different papers. The point of making a leftover card is to use as many leftovers as possible. The best way to do that is to pick a subject for the card and take out all the papers that are suited to the subject you picked. My subject was summer so I took out papers that had summer colors and summer patterns like surf boards, kites and flowers.


Have fun creating!

Einat

Friday, May 25, 2012

Holiday in white


Tomorrow Jews will be celebrating the holiday of Shavuot. This is a very special holiday with a double meaning: religious and agricultural. The Torah (first five books of the bible) was given by God to the Jewish people (and the world) on Mount Sinai more than 3300 years ago. Every year on the holiday of Shavuot we renew our acceptance of God’s gift, and God “re-gives” the Torah. The torah is considered to be like milk to a baby, a necessity, something basic to every person and internationally known. That's why in Shavuot it is customary to eat dairy dishes and wear white.
The word Shavuot means “weeks.” It marks the completion of the seven-week counting period between Passover and Shavuot. This is the time of year that summer begins and the harvest starts. In the old days when the temple in Jerusalem existed, it was customary to bring part of the first harvest to the priests in the temple.

Have fun creating!

Einat

Thursday, May 24, 2012

Through the years


I try to scrap my photos in an organized way so there wouldn't be too many leftovers and photos without a layout. But sometimes it doesn't work and I have those tails…photos that for some reason didn't find their way to a page. This layout was created with three of those photos. They're not from the same event, day, or year and there are different sets of people on them. The only thing in common is me, in different ages. So I created a layout about me through the years.
The layout was created according to the Scrapping Everyday Miracles May's sketch. You can join in the fun and create your own layout with your own interpretation. You can find the sketch here.

I used all kinds of embellishments on the LO to symbolize the different periods and ages in my life. On the right near the baby photo I put a bicycle, butterfly, a bird and a clock. Then flowers to symbolize growth and on the left near the family photo I put a house, lovebirds, and a wooden mannequin dressed as a bride. The wooden embellishment was the scrap twist of the sketch and it worked out perfectly.

Have fun creating!
Einat

Wednesday, May 23, 2012

Maximize your supplies: Generations


What happens when you have a double sided paper but you can't decide which side to use? Use both of them! In this layout I used both sides of a Kaiser Craft paper from the Timeless collection.
First I cut the letters I needed for my title. I tried to use letters that were close so I wouldn't have to cut the whole paper. Then I used the other side of the paper I got left as part of my background.

I also used the backing of the rub-ons package that had a really nice swirl on it. So basically I created a layout from 2 papers, backing of a package, a few rub-ons and flowers. The most expensive item on the LO is the wooden embellishment.

Have fun creating!

Einat

Tuesday, May 22, 2012

Ins(paper)ation: Patterned Paper


"Our happiness will always be found within a narrow compass, and in the middle of the objects more immediately within our reach." Edward G. Bulwer-Lytton
This layout was inspired by a patterned paper I had. It has a compass pattern on it and I couldn't decide what to do with it. My initial idea was to scrap something related to travel but I didn't have the right photos. Then I had an idea to use the compass theme in the title and build my LO around it.

To create my scene I cut the rainbow out of a Fancy Pants paper and added a sticker as the sun.  I added more Jenny Bowlin stickers and the title.

Have fun creating!

Einat

Monday, May 21, 2012

Technique corner: using a title to make a point


Sometimes I get my layout ideas from places that surprise even me. One of the papers of this month My Punch's Kit of the Month Club had the Title: "Little Hands, button nose, chubby cheeks, tiny cloths".   When I saw it I thought to myself what a great title, too bad it's not applicable to me, since my boys have already passed the tiny stage and there are on their way to huge…but then again, I thought why not use it, design a layout exactly about that?
So, I took the title and changed it in a way that would be visible and stress the point I want to make. The "little" turned to "large" and the "tiny" into "big". I used small bold colored letters to write the new words so they would be noticeable enough but not too big. I also added the title GROWING to put everything in context.

Have fun creating!

Einat

Friday, May 18, 2012

You love books - Photo or paper first?


How do you create your layouts? Do you have a photo you just have to create a layout for or did you just buy a new paper that screams "please make me unto a layout". I do both, but this layout was inspired from one small rub-on. One of the products in the My Punch's May Kit of the Month Club was a set of rub-ons that one of them was a stack of books.  That was just the right rub-on for a set of photos that I had.
These are more photos of the special day I had with my son. He loves books and he loves to go to book stores, browse through the shelves and see what new books he can buy. He just walks in the store, sits on the floor and starts reading… so adorable, if you can say such a thing about a 13 years old…

Have fun creating!

Einat

Thursday, May 17, 2012

101 Flowers Tutorial #15: Folded Paper Flower


Another fun and easy flower tutorial coming your way! This time it's really simple to do and you can use your scraps!
1.       Punch 5 circles from double sided cardstock. It can be in any size, you can even use scalloped circles, as long as all five circles will be the same size.

2.       Take two circles. Fold the first one in half. Open and fold in half the other way, creating a cross shape.
3.       Open and fold in half again, creating a diagonal middle line in the middle of the cross.

4.       Flip the circle over and fold the last fold the same way.
5.       Repeat with the other circle.

6.       Repeat the process with the other two circles starting from the opposite side.  If you started with the green side up, now start with the blue side up.
7.       To create the petals of the flower, fold the middle line in and the other two lines out.

8.       Repeat with the other three.
9.       Adhere the four petals on the fifth circle.

10.   You can leave it puffed, or you can flatten the folds and add a pearl or bead in the center.

Have fun creating!

Einat

Wednesday, May 16, 2012

Just the 2 of us


Another one of my layouts was chosen to be published in Prima blog. I feel blessed and honored to be featured month after month along with a very talented group.
This is a layout I created with a photo of my son and me having a great lunch in his favorite restaurant as part of our special day together.  We wanted a photo of the two of us so I pointed the camera, pressed the button and this is the result. The layout was my interpretation of the April sketch.

Have fun creating!

Einat

Tuesday, May 15, 2012

Kreative Blogger Award


I'm happy and excited to tell you that I was really lucky to be nominated for the Kreative Blogger Award by a very talented lady ShirA Ganany. I'm really grateful that there are people who read and love my blog.


As a winner of this award I need to:
 1. Mention the awesome blogger who gave me the award – the talented ShirA Ganany of The little green box. Thanks ShirA! ShirA is the queen of Pop-Up. Her creations are pure magic and every creation is more beautiful than the last one. If you want to see how much creativity and magic she has in her hands visit ShirA's blog. 
2. Share 7 interesting facts with my readers.
3. Nominate 7 other bloggers, with their links, and let them know about it!

Here we go…7 facts…
1. I love science fiction TV shows and movies. I know the "Back to the Future: trilogy by heart  and I have all 10 seasons of "Stargate" taped for repeat watching.
2. I am the same height as I was when I was 12 years old…yes I'm short!
3. I always procrastinate. I wait for the last minute to do things, but I do my best work under pressure and I never miss a deadline.
4. I once wanted to be a kindergarten teacher. Not anymore…
5. I love to cook and to eat even more!
6. When I was a student I used to work as a dental assistant. It is then I discovered I don't mind the sight of blood and other stuff you see in the dentist but I prefer not to mention.
7. Driving around a square or walking down the stairs makes me dizzy.

Now that you know me a little better, here are my 7 choices for the Kreative Blogger Award:
1. The Israeli blog "Playing with paper – a journey" by Ilana. Other than being a very talented lady she is the most creative and funny writer. Every blog post is a pleasure to read and a beauty to see. It's in Hebrew but you can always use Google to translate and it's worth it.
2. "Just a girl with ideas" blog by Emma from Australia is a very inspirational blog. I just love her style. Every time I look at her creations I discover something new!
3. "La – De- Dah" is a mixed media blog by Sarah, a very talented artist from the UK with a unique style.I love all the details in her work and her use of colors and materials.
4. Another Israeli blog "Craft addict LTD" by Irit. One of the leaders in the Israeli scrapbooking scene and a very productive designer who always manage to surprise me!.
5. "Eleele Handmade" blog by Eleele from Belarus. Her style is really special and inspiring. Her work has a soft but rich touch.
6. "The Scrappiest" blog by Liz is full of colors and happiness. Liz's designs always make me smile because they are so colorful and cheerful.
7. Last but not least "Studio Tangie Baxter" blog. Tangie has a special way of looking at art journaling. I love her crazy style!

A lot of inspiration and ideas!
Have fun creating!

Einat

Monday, May 14, 2012

The Best Birthday Blog Candy Winner


What a ride!! Four weeks of fun are over! I have to say this truly was the best blog candy, not just because of the candies that were really yummy, but because of all of you my friends!! You gave me so much love, support, good wishes and congratulations that I thought my heart will burst. You all made me feel really good THANK YOU!!!

I thought being 40 will be sad. Mid life crisis…you know how it is, but I was so wrong! Who can be sad when you have a smile on your face because you know you have such great friends? You warmed my heart, sweetened my days and gave me the most wonderful birthday gift…happiness. THANK YOU!!!

And now without delay here is week 4 winner:

Congratulations Candice B.

All of you who didn't win, don't worry there is another blog candy just around the corner :)

Have fun creating!

Einat

Friday, May 11, 2012

Maximize your supplies: Home Mini Album


This is a fun easy mini album made from scraps and one piece of paper that has big tags on it. I used the tags for pages and the brown cardstock for the cover. The embellishments are mostly from a patterned paper piece that has houses on it so I could cut them out. I also used some flowers, buttons and scraps of ribbon. This is a great mini album to create from all the leftover papers and embellishments you have in your drawers or in a box.

Just one challenges this time:Ladybug Crafts ink #60: Anything but a square

Have fun Creating!

Einat